- Open up the Control Panel (in My Computer)
- Click on the Network icon
- If you do not have the Client for Microsoft Networks:
- Click ADD
- Click on Client
- Click on Add
- Click on Microsoft on left
- Click on Client for Microsoft Network on right
- Click on OK
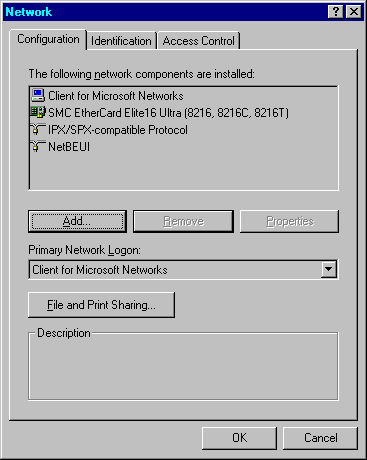
- The Client for Microsoft Networks should appear as shown in the panel below. Set it as your primary Network Logon as well (unless you have a Netware server)
Configuring your PC's Identification
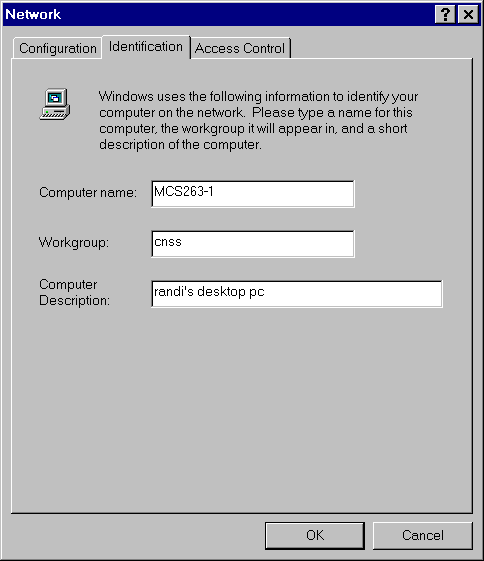
- Next Thing you should do is configure your computer's identification on the Microsoft Network, by clicking on the IDENTIFICATION tab at the top of the Network control panel
- Now enter the computer name. Use your standard building and room number together with no spaces followed by a DASH and a number. Use 1 for the first machine in that room, use 2 for the second, ...
- Next enter your workgroup name. Please limit your department to one workgroup. This will cut down on the size of the network neighborhood, making it easier to use. Obtain the name of your workgroup from your Lan System Manager. If you are unsure of who your LSM is, send email to [email protected] and ask.
- Finally enter a short description, indicating whose computer it is and/or what it is used for.
- Click on OK and reboot if necessary
- Your Network Identification Setup should look something like:
Configuring sharing
- If you wish your computer to appear in the Network neighborhood, you need to turn on file and/or print sharing on. If you do not turn it on, you will not appear in the network neighborhood. There is no need to turn it on unless you are going to share something. If you have something to share you MUST turn on file and/or print sharing or you will not get the SHARING option when you right click on the Folder, Drive or printer that you want to share.
- Click on the File and Print Sharing button in the network control panel
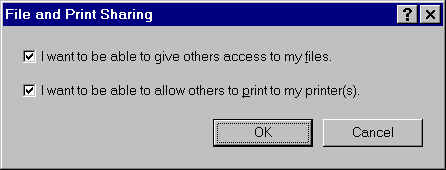
- If you want to share files, check the share files button.
- If you want to share your printers, check the share printers button.
- Here is how the screen should look if you share both. Click on OK and restart if neccessary.

- Click on OK and restart if neccessary.
How to Share and Receive
- After turning on File and Print Services you may share a Drive, Folder, or a printer. To do this Simply Right Click on the item you want to share and choose Sharing...
- If it is a Drive, you may need to click on the Sharing Tab at the top, Then Click on the "Shared as" radial button and assign a share name to the share. (Tip: Share names that end in $ do not show up in the network neighborhood.)
- Finally choose whether you want readonly access, or full access, or both. Enter the password(s) and click on OK. (Tip: If you leave the password blank anyone can get to the file.) People who use the readonly password have readonly access and people who use the Full access password have full access.
- The other remote computer that wants to use the share can map a network drive to the drive or folder share by right clicking on My Computer and choose "Map Network Drive". Pick a drive letter and specify \\computer_name\share_name of the computer and share that you want access to. (Tip: This is called the Universal Naming Convention (UNC)) When adding a network printer, use the same UNC as noted above when specifying the Network path or queue name.

