To configure TCP/IP in Windows NT 4.0 at SWT:
- Go to START, SETTINGS, CONTROL PANEL and double click Network.
- Click the Identification tab at the top and you will see the screen
below
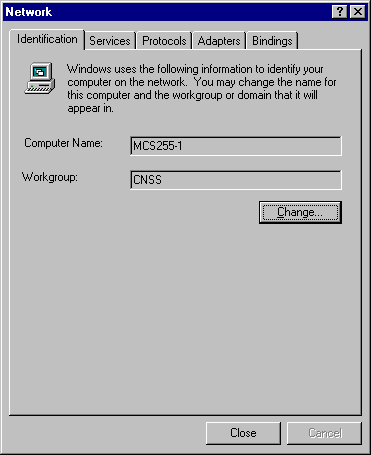
- Click on the Change button and enter the computer name of the workstation. I suggest you use the
standard building abbreviation followed by the room number (no spaces) followed by a dash and 1 for the first PC in the room, a 2 for the second PC in the room, etc. For workgroup, I suggest you use the subdomain name in your assigned IP name. Example: My IP name is swift.cnss.swt.edu, so I use CNSS as the workgroup name. Next click on the protocols tab at the top and you will see a screen like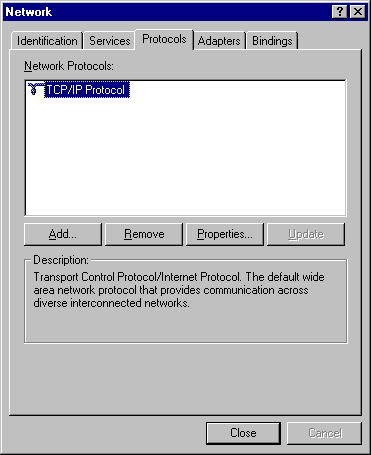
- If you have the TCP/IP protocol listed like above proceed to step 6. Otherwise
click on add and you will see the following screen
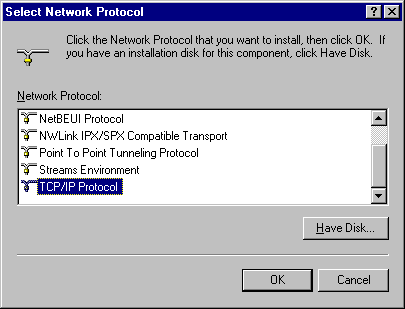
- Highlight the TCP/IP protocol, then click OK and follow the instructions.
- After the protocol appears in the screen like in the picture in
step 3, Double click the TCP/IP protocol (or single click the protocol, then click properties) then click on the IP address tab at the top and you will see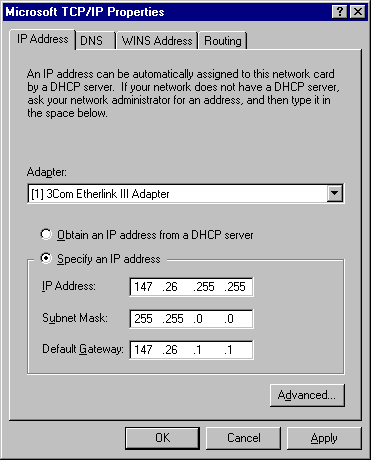
- Check the "Specify an IP address" radial button, and enter YOUR IP
address that was assigned by your LSM. Enter the subnet mask of 255.255.0.0
and default gateway 147.26.1.1. Now click on the DNS tab at the top and you
will see the following screen
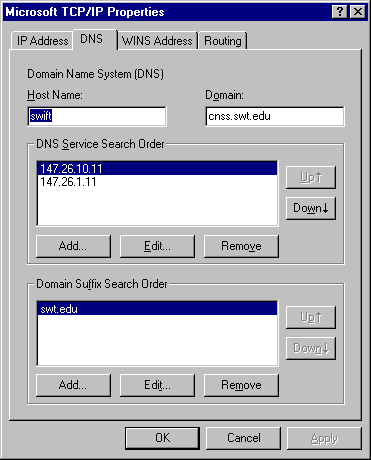
- Enter the first part of YOUR IP name under Host Name and the rest of
your IP name under Domain. (Example: I am swift.cnss.swt.edu so I use
SWIFT as the host name and CNSS.SWT.EDU as the domain. Then click on add in
the DNS service search order box and enter 147.26.10.11, then click add
again. Now click add again and enter 147.26.1.11, then click add again. Next
click on the add button in Domain Suffix Search Order box and enter swt.edu
then clcik add again. Finally click on the WINS button and you will see a
screen like
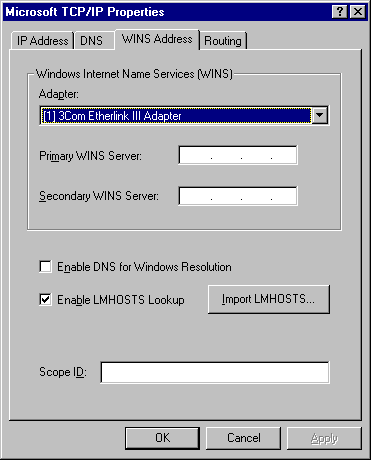
- No changes need to be made to this screen. Everything should be blank
except for a check mark by Enable LMHOSTS Lookup. Click on the routing tab
at the top and you will see
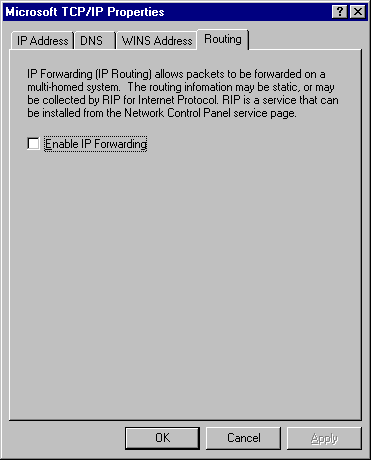
- The enable IP forwarding should be left UNchecked. Finally click on ok and restart you computer.