- Summary
This article explains how to configure Windows NT 4.0 Dial-Up Networking for using SWT as an Internet Service Provider (ISP).
In Windows NT 4.0, the configuration for connecting to ISPs is different from the configuration in Windows 95. There is no dial-up adapter in Windows NT 4.0, however, TCP/IP is still the core component.
- KERBEROS information will be required
You must have already requested and received a kerberos account through your VMS account. If you do not have a VMS account go to MCS 263 with your Student ID (faculty/staff call 245-2501) and get one then login to the VMS system and issue these commands$ GADGETS
pick the task menu
pick the option about requesting a kerberos account
- Remote access Services (RAS) will be required
The following instructions also assume that you have already installed Remote Access (RAS) on your computer. If you do not have it (i.e. no dialup networking icon in my computer) follow these instructions
Go to START, SETTINGS, CONTROL-PANEL, then double click the Network icon, then click on the services tab at the top. If the remote access service is not listed the add it by, Clicking Addl and the click Remote Access Service, and finally click OK and follow the instructions that appear. Note: To start Remote Access Service, you must first restart Windows NT.
- To configure Windows NT 4.0 to connect to SWT as an ISP using PPP:
- Got to START, SETTINGS, CONTROL PANEL and double click Network.
- Click the Protocols tab at the top and you will see the screen below

- If you have TCP/IP go to step 5,
otherwise click Add and you will see the following screen

- Select TCP/IP Protocol, click OK and follow the instruction on the
screen to provide the source files to install TCP/IP.
- On the Windows NT Desktop double click My Computer and you will see the following screen.

- Double click on the Dial-Up Networking icon. (If it asks you to install it, click INSTALL).
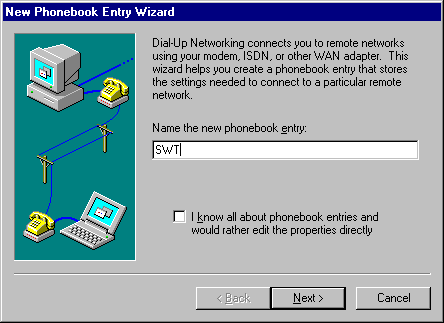
- If your phone book is empty, it will ask you to click OK to add an entry. Do what it says. (Note: If you already have entries or do not wish to use the wizard adder, check "I know all about phonebook entries..." and go to step 24).
- Under Name The New Phonebook Entry, type a name for the ISP, for example SWT:
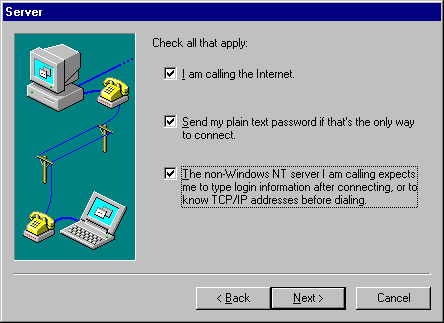
- Click Next. And check all the boxes on the screen as follows
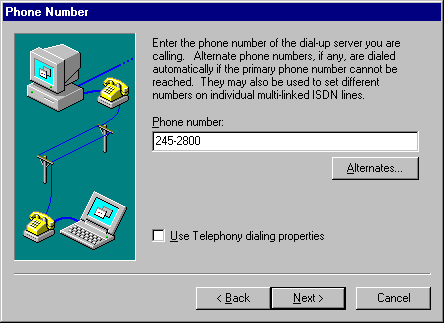
- Click Next and Under Phone Number, please enter SWT's ISP phone number 245-2800 local, 1-512-245-2800 long distance, 5-2800 on campus.
- and then click Next. Choose PPP on the following screen

- Click Next and choose Use a terminal window

- Click next and make sure you leave the ip address as 0.0.0.0
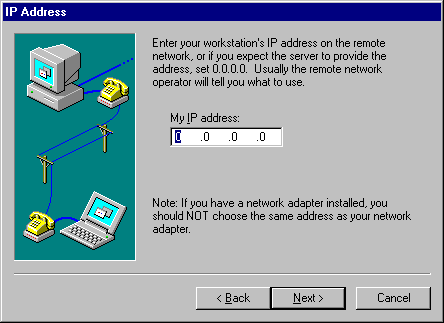
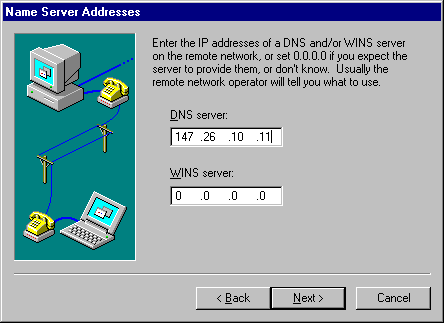
- Click next then enter 147.26.10.11 as the Name server address, leave WINS 0.0.0.0
- Click Next, the click on finsh to save the entry

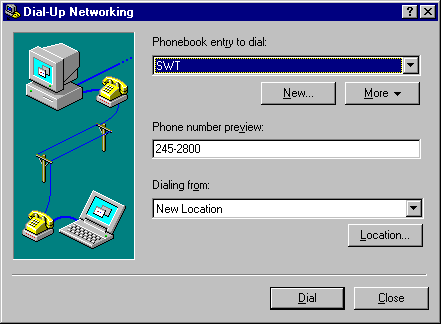
- Now you will see the dial-up networking phonebook. Choose SWT in the pull downlist (it may already be chosen) on phonebook entries to dial and click DIAL
- Then enter your username and password you want used to access remote resources on the network. Choose save password if you wish
- Click OK and you will see

- After it connects to SWT you will see a blank screen, hit return and you will be prompted for your KERBEROS username and password. The kerberos username is usually the same as your VMS username (or account). The kerberos password is the one that is E-mailed to your VMS account when you request a Kerberos account. Enter the password in lower case as it is case sensitive
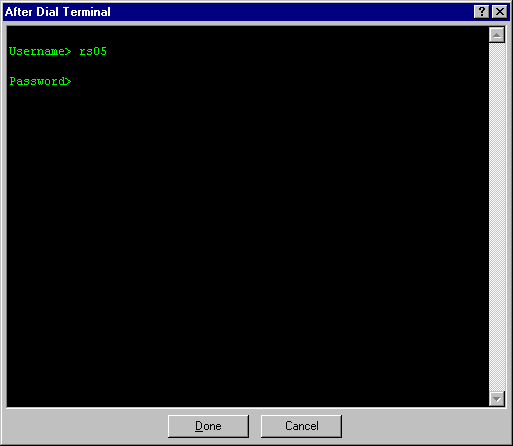
- If it says authentication unsuccessful, either your username and/or password were entered incorrectly and must be reentered. If you are authenticated successfully you will see the following menu options
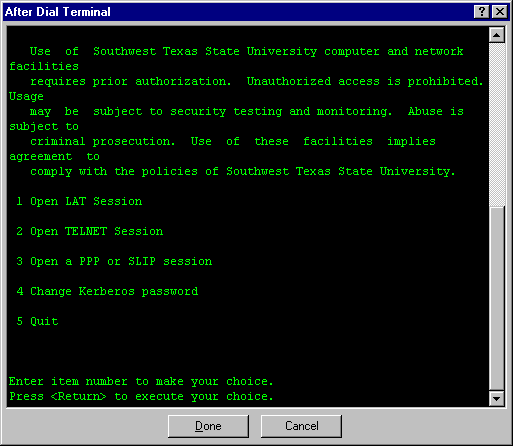
- Enter a 3 and return. Be sure not to hit anything else before this! And you will see something like

- Click Done and you will see
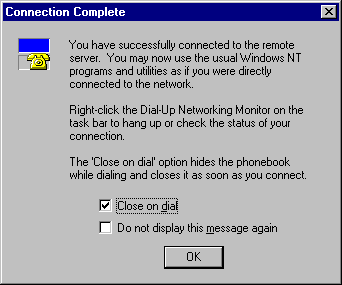
- Read it carefully as it says how to disconnect when you are finished using the internet, then click on OK. Now you can start your internet applications such as Netscape or Internet explorer.
- If you did not want to use the wizard adder or already had entries in your phone book you can either add a new entry by clicking NEW in the Dial-up Networking box and fill the screens in as follows. Or if you wish to correct or check an entry, click More and choose Edit Entry And Modem Properties and verify the following screens
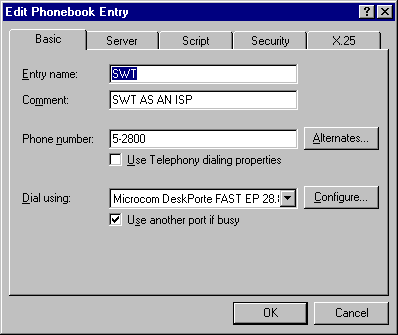
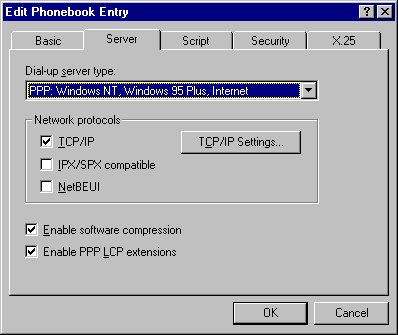
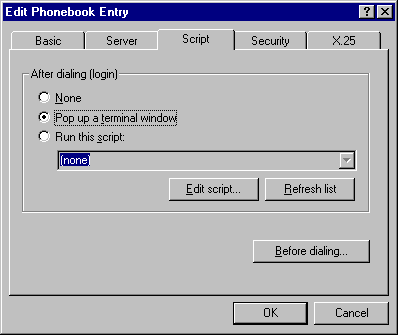
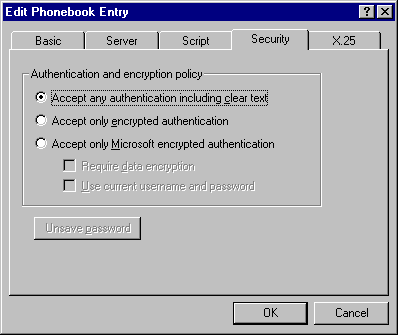
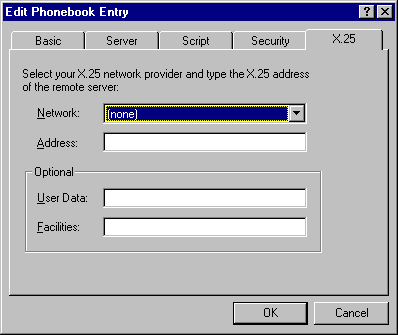
- After verifying or adding this information, click ok and proceed to step 16 to try the entry.
- On the Windows NT Desktop double click My Computer and you will see the following screen.
- Got to START, SETTINGS, CONTROL PANEL and double click Network.